Friday, September 6, 2013

Turmeric

A month or so ago, I became aware of the health benefits of turmeric.  Click here for that article.  It is apparently related to ginger, and I was looking for something to help with inflammation. I absolutely hate taking ibuprofen, and needed a back up plan for My Pain Relief Tea. I figured that something as innocuous as a spice would be easy enough to incorporate into my life, and from research, there were not any side effects that I, myself, needed to be worried about.

I ordered some from Mountain Rose Herbs, 8 ounces for $4.25 of certified organic ground turmeric root (rhizome). I have ordered more than a few times from Mountain Rose Herbs and have been completely satisfied with everything about them, their products, their professionalism, their delivery. Here is the turmeric that I ordered.

When I got it, I tried it in a tea (made the paste, etc.) and guess what? I don't like it. I just don't like the taste of it. I even tried a lemon turmeric iced tea, and ... no go. I just can't stomach it. I don't like Indian food either, and turmeric is used in curry.

So what to do?


Enter The Capsule Machine. :)

This is a handy, nifty tool for filling your own capsules with whatever you want to fill them with. I got mine from Amazon.com, but you can shop around.


Mine came with 1,000 capsules.
It really is a great machine! If you ever have rolled your own cigarettes? this is so much easier than that, and way better for you than that too.

I am going to get my turmeric into my body somehow!


I read from Dr. Weil that turmeric is not well absorbed without piperine, which is in black pepper (see another great article here) so I added some black pepper to my turmeric.

I didn't get too scientific here, just put a few dashes of black pepper into my turmeric bowl and mixed it up.

I'm not sure if it was enough or not, as I can not find ratios anywhere that might be best.


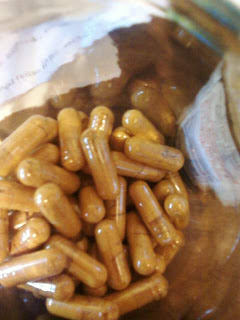
But onward I pressed, and found that the machine is super easy to use. Maybe a little messy, and be forewarned, turmeric stains things yellow...even my fingers.
But I now have some turmeric that I can stomach! YAY!


I will update in the next several months to let you know if this helped with my arthritic and muscle pains from fibromyalgia.
Best Wishes!
~~Mama Trep
*please do your own research on this great spice!

Try this, ok? Extending the life of Dawn Dish Soap


Yep! That's only one sink-ful!
Try this, ok? It is one way I stretch a buck.


A while back, I was thinking about what I spend money on. Things that recur in time and that I have to spend money on to take care of them, well...these really piss me off.

You know, it's laundry, dishes, trash, cooking, cleaning...


I have learned to make laundry soap and cleaning supplies. But today I'm going to share with you how I stretch what I do spend on washing dishes. It is not exactly non-toxic, but I have tried to wash my dishes with castile soap mixtures, and I agree that you should probably try that yourself first, if you really want to go the non-toxic route. But I miss the bubbles, and the no-nonsense, git-r-done clean of using Dawn dish soap. I've washed a few dishes in my lifetime, and have tried all kinds of dish soap, and always come back to Dawn.


So try this:

This is what you need:
  • 20 to 24 oz of Dawn *I like it for grease cutting.
  • 1 cup borax
  • 1 cup washing soda *baking soda works too
  • 1 empty gallon jug
Directions:
  1. Funnel borax and soda into gallon jug, fill jug with warm water about half way, then cover and shake it until all the crystals dissolve.
  2. Add all of the Dawn that you bought. Swirl it gently around to mix. Try to not make any bubbles. 
  3. Fill gallon jug up slowly the rest of the way with water. Again, try to avoid making bubbles so you can fill your jug.
  4. Pour some of your new mixture into the Dawn container to leave at your sink.
    Just refill your Dawn container as needed, and keep the rest in the gallon jug put up.
Voila! A gallon of dish soap. 

I have also used this as a stain prewash for laundry, especially on grease stains, and it works!

Thanks for reading! Best Wishes!
~~Mama Trep

Saturday, June 15, 2013

I'm Soaking In It--The Benefits of Epsom Salt and Sea Salt Baths for Me

I guess it began as general knowledge, that soaking something in epsom salts and sea salts could draw out infections, or help with muscle aches and pains. It may have been something handed down to me from my mother, or grandmother. It's one of those things that I can not quite pinpoint, but assume to be true, because of repeated exposure to hearing it.

There are some that say that the benefits of epsom salts and sea salts are myths, that there are no studies done that prove that soaking in epsom and sea salts provide any benefits at all, that perhaps it is the act of soaking in hot water alone that provides the benefits. I have not conducted any scientific studies. I can not add anything to that discussion, except to say that I love my epsom and sea salt baths. They make me feel better, in terms of mood, relaxation, pain relief in muscles and joints, softer skin, energy level, and are especially helpful when, like now, I have a viral infection (a summer cold that has settled in my lungs).


I am not alone! Well, yes! I'm alone in my tub! But many people share my love of soaking with epsom and sea salts. A simple search online will provide many testimonials and recipes and methods of use.

Epsom salts are magnesium sulfate. Magnesium is required in our bodies for proper functioning of numerous enzymatic activities. From muscle control, nerve impulse control, digestive processes, in fact, over 300 processes in the body require magnesium. Our diets are magnesium poor, because of depletion in soils of modern day "farming," but magnesium can be found in foods such as leafy vegetables, legumes, nuts, seeds and whole grains.

My online searches have also discovered:
  • Magnesium is also found in dark chocolate. 
  • Magnesium deficiency has been linked to depression. (Ahhhh, so that's why perhaps I crave chocolate, and why chocolate gives me the "lift" I need.)
  • Epsom salt baths can help with autism.
Read here for more of the health benefits of epsom salts and here for how epsom salts baths work.

I include sea salt in my baths because of it's health benefits too, for healing skin issues, which I have from lichen planus. I have witnessed first hand the benefits on healing of a good soak in the sea. Regular table salt won't do. Sea salt has trace minerals that your body needs which are not present in regular table salt. Table salt is just sodium chloride. Sea salt is sea water that has been evaporated. There are many resources online that tout the benefits of the salts from different seas, in particular Celtic Sea Salt or Dead Sea Salt. Again, these are choices you can make based on your own research. Sea salt is also reported to help with detoxing your body. Read here for more information about the benefits of sea salt.

I also include lavender in my baths because of its antibacterial and antiviral properties. The benefits of lavender are abundant, but include helping stress, anxiety, pain, hair loss, insomnia, respiratory ailments (including bronchitis and sinus infections), urinary health, and skin disorders. Again, a simple online search for the benefits of using lavender will produce many resources, including this one from the University of Maryland Medical School.

So what follows below is the "recipe" which is not really a recipe. It is so simple in fact, and can be done in so many ways, that I hope you will try. You can use plain epsom salts, or plain sea salts. You can combine them in different proportions, depending on what you have on hand. You can eliminate the lavender essential oil or you can use a different essential oil, depending on what properties you are looking for, or again what is on hand. For instance, I make up some of the epsom salts with tea tree oil for a foot soak for my youngest girl, to help with ingrown toenails.

My Epsom and Sea Salt Bath Soak with Lavender
  • Choose an empty, clean, preferably glass container with a lid.
  • Add epsom salts about 2/3 of the way up.
  • Add sea salt to within an inch from the top of the container.
  • Add 25 drops of lavender essential oil.
  • Shake container well, and allow to sit at least overnight before using.
  • Use about 1 or 2 handfuls of this mixture in bath of warm water at least once a week, more often if needed.
A special note: at this point in time, I am using what I have on hand, readily available to me. I find my epsom salts at a local department store, my sea salt at the grocery store, and my lavender from Mountain Rose Herbs.

I hope you will try to make some special salts of your own!

Best Wishes!


Friday, June 14, 2013

DIY and NON-TOXIC My Mosquito Repellent

Because of all the rain this year, and frequent flooding in Northeast Tennessee where I live, the mosquitoes and gnats are rampant! Going outside to sit on the deck can be quite a challenge, in shorts and sandals. I have discovered an all-natural and non-toxic solution to keep these pesky critters away from me!


Not everything written on the internet is true! When I do any kind of research on the internet to find solutions to my particular problems, I usually do a search on google.com or bing.com, and open at least 10 different random links or more related to the search. Sometimes, the results are straight-forward and the results point to pretty much the same things or answers. Other times, though, the results can be confusing and have varied answers, or conflicting answers. I will usually trust an answer if I see it three times. Sometimes this points to one resolution for me, and I decide on one course of action. Sometimes, I have to keep researching, or wait until later to do additional searches, ones that may be more specific, or worded differently.

In this case, mosquito repellent, I decided to shun the chemicals used (like DEET) in commercial preparations. Granted, I am not back-woods camping, I am not located in a swamp...I am just sitting on my deck in the morning and evenings, and wanting to avoid my legs getting eaten alive. I wanted to do this as naturally as possible, without chemicals, and with things that I have access to.

Here is an article on the different aspects and strategies that was helpful to me. Of course, doing your own research is recommended, based on your specific situation. This article has a list of essential oils that may be used that mosquitoes do not like. Use what you have on hand!

Based on what I learned, I came up with a simple answer for me:

My Mosquito Repellent

2 ounces of carrier oil, Sweet Almond Oil was used
20 drops of lavender essential oil
20 drops of lemongrass oil

Mix in recycled dark container. Dab on ankles or exposed skin lightly.

My Mosquito Repellent in use (oops...sticky label residue still on the bottle!)

Please note, that some essential oils can cause irritation to the skin, itchiness, redness, in high concentrations. If you notice these, you can decrease the concentration of your mix by adding more of the carrier oil to your preparation, or decreasing the amount of the essential oils added. The important thing is to use enough of the essential oils to confuse the smelling of the moquitoes, so that they do not recognize you as a good source of something to feast on.

You can also use a cotton wick or fiberglass wick to make this into an oil lamp, that will burn and scent the air around you with the oil and essential oils in your jar. I tried to do this (maybe you can see it in the picture) with a small piece of twine, and a washer, but the twine does not wick up oils well at all, and just burns for about 5 minutes. I have even learned that strips of an old cotton sock can be used for a wick in a pinch. The important think is to separate the burning wick with enough space so that the heat from the flame will not cause your jar or bottle to burst. Oh dear! Please don't do that! Take your own precautions, please and do a little more research.

Fat Cat is investigating...


Here and here are two articles on how to make your own oil lamps out of bottles, mason jars, and even rocks, with minimal supplies. This is a definite must do project in my future!

So there you have it! My Mosquito Repellant! This works quite well, as I have not had a single mosquito bite all week since I mixed this up and have been using it!

As always, Best Wishes!


Monday, June 10, 2013

My Pain Relief Tea

Just a quick note about this thing I've been doing this week.

Some of you may know I have been struggling with abscessed teeth. In order to get these teeth pulled, I have had to come off of my regular regime of ibuprofen for my muscle and joint pain, as otherwise I would bleed too much when the teeth were pulled. I tried a couple months ago to come off of ibuprofen, replacing with Cats Claw supplement, but this didn't work.

And because I don't give up, and I'm always learning, I decided to try ginger. I used to drink straight up ginger tea to prevent stomach ulcers way back when, a long time ago, when I was on prednisone for my illness. Ginger has anti-inflammatory properties.

Peppermint helps to soothe muscles; the lemons are great for boosting the immune system; cucumbers help the liver in detoxing, and aid in connective tissue regeneration; the honey is for a mild sweetener, also aiding in seasonal allergy reactions.

I can successfully say that what I have been doing now works for me. I don't need the ibuprofen anymore. This is important to me, because:
  • I'm less reliant on a store for pain relief
  • I won't have the skin issues I have had from taking ibuprofen
  • With the exception of lemons, these are things I can grow myself
  • My kidneys will thank me
  • There are other benefits to taking this, besides just the pain relief
 So here it is, My Pain Relief Tea:

1 cucumber, washed with peel left on, sliced
1 lemon, washed with peel left on, sliced
1 handful of peppermint leaves, washed and rolled and chopped
about 3 inches of ginger, peeled and chopped fine or grated
one gallon of water, boiled
1/4 cup local honey

Put all except honey in gallon jug, and allow to cool completely. Strain. Add honey. Refrigerate. Sip as needed.

My plans are to can enough of the ingredients for a year supply, in concentrated form, so that one jar (not sure what size yet) can make a gallon. I will update you on this.

I also plan to find and try turmeric, which has a lot of anti-inflammatory properties.

I did a quick google search and found this link which is about the same. 

YAY!
Have you given up on finding a natural cure for what ails you? Keep trying to find it!


Thursday, June 6, 2013

SOAP!

Some of you who know me...well, you know I can stretch a dime. Sometimes I wonder why everyone doesn't do this, but honestly, I couldn't care less. I am too busy doing it for me that worrying what everyone else is doing is just a waste of energy. But here you go! This is what I've been doing this past month. SOAP!

Herman keeps asking "so...what are you going to make today?"

Well, yesterday, I didn't make soap, but made another batch of yogurt. Only this time, I didn't really follow directions and measure things, just heated a bunch of milk, maybe a little over half a gallon. I didn't cool it off in a sink of cold water, just let it set and cool on the stove. I was busy with my grandson, Hendrix. And busy trying to clear off the deck with Herman.
Me and Hendrix...isn't he beautiful?

I had to buy another cup of yogurt because I forgot to save some out to make this batch. Oh, and I also wondered about how thin the yogurt was last time, and wondered if it didn't have enough warmth to grow. So this time, about four or five times throughout the day, when I remembered it, I turned the crock pot that the yogurt was in on warm for about a minute, while still keeping it covered with the towel. YAY! Nice thick yogurt!

And ant spray. I made ant spray yesterday. Those little buggers, what I grew up calling "sugar ants," are all over the counter by the sink. I tried sprinkling coffee grounds where I thought they were coming inside, but they just rerouted themselves around the coffee grounds, and I ended up with ants AND coffee grounds all over the counter. Yuck. I have heard that ants follow each other by scent they leave behind, and if you can disrupt that scent trail, that will help getting rid of them. Using a recycled 4 oz. spray bottle, I filled it half with rubbing alcohol, half with tap water, and added 25 drops each of lavender and lemongrass essential oils from Mountain Rose Herbs. I can tell you this much: the ants don't like it much. The spray kills the ants, and they avoid where I have sprayed AND my kitchen smells great!

So SOAP! is the name of this post, and that's because I have made so much soap this past month. I wanted to make this blog a regular thing, but have been busy! Forgot to take pictures! In the past month, I have made the following:

  • Liquid Castile Soap
  • Castile Bar Soap
  • Body Wash
  • Sunscreen
  • Hair Detangler
  • Facial Scrub
  • Relaxing Oil for Sleep
  • Laundry Soap
  • Dish soap
  • Tub Scrub
  • Citrus Vinegar
  • Scented Epsom Salt for Baths
  • Liquid Hand Soap
  • Acne Wash
  • Deodorant
Certainly, not all of this is motivated by frugality. In fact, I would estimate about half the motivation is to save money. The other half of the motivation is to remove toxins from my home.

Some of you may know that me and my family of origin have struggled with a host of autoimmune illnesses, including sarcoidosis, lupus, MS, arthritis, thyroid destruction, lichen planus...with very few answers to the question "Why?" We also have in our family: renal cancer, alzheimer's, prostate cancer, COPD, anxiety and depression, substance abuse...so I am in search of answers, mostly from a personal standpoint of what makes me feel better. Forget the why? for now, because I think the answer to that may never be found. What can make me feel better today?

I no longer have a use for chlorine bleach or ammonia. It chokes me. I use vinegar, castile soap, baking soda, epsom salts, borax, washing soda, and essential oils to clean. (I also still use a little bit of Dawn soap.)

I no longer buy soap for personal hygiene, nor deodorant for that matter. I use all of the above with the exception of the Dawn soap for that. Add into the personal care arsenal: coconut oil, olive oil, cocoa butter, shea butter, aloe vera, beeswax, zinc, corn starch, and sweet almond oil.

When I look back on the past month, I really have to realize how much I have accomplished (HA! even though my house is dirty! LOL) by replacing all of those products with healthier versions that work just as well or even better, AND cost less!

This route is not for everyone, I know it. I have time to do these things. I have done a couple of projects with my friend, Victoria, like the laundry soap. We do it together, and split the batch of soap (each batch makes 10 gallons).

And Herman is right by my side through all my projects, helping at every stage, and reminding me of essential things that need to get done besides the current project. There's not a moment goes by when he is not my biggest cheerleader. Especially with the castile soap projects, I think he hung around to see if it actually would all come together ;0)

I've decided to write more on each of the above list of projects, as a beginning to my regular blog entries. So stay tuned!

So...what are you going to make today? 

Saturday, May 18, 2013

Confidence and Yogurt!

Yogurt from the crock pot! So, so easy!
My little one is on antibiotics for 2 weeks, and has been eating store-bought yogurt to counteract some side effects, and I finally broke down and made some yogurt! I really thought it would be more complicated, but it is so easy. I made a gallon! WOW!

One of my favorite things I use in my quest for independence and self-sustainability is the internet, because I learn so much. Money Saving Mom and Keeper of the Home both have wonderful blog posts about making crock pot yogurt, with recipe, techniques and pictures, and so I won't go into that here. (Just click on those links to see their posts.) The internet is great for all of the ideas you can get, all the knowledge available, but without action and experience, it really is all just stuff in your head.

My amazement comes from actually doing this project that I have put off for so long. I really wish I had done this years ago. I remember looking in stores for kitchen gadgets, looking for a special appliance that would make yogurt. There probably is such an appliance out there somewhere, but I don't need it anymore. I have my crock pot! I am amazed at how little time it actually took (only about 20 minutes of my time, aside from the actual waiting). I'm thrilled and relieved that it's done, and that it worked! And that I didn't burn anything! I now have a new skill that I can bring into the future, so come what may, I can make yogurt. If you are younger than me, love yogurt, and have a crock pot, take heed! Do this for yourself! Do it sooner than later!

Here's a few more pics of my yogurt, with some things I learned.


1. A gallon of whole milk weighs 8.6 pounds.
2. A gallon of HOT MILK feels like it weighs 86 pounds, because you have to take such care not to get burned. Take this into consideration when planning how much yogurt to make.
3. I don't like plain yogurt. Maybe you do, but I don't.


4. But I do love strawberry yogurt, as does most of my family.

5. I blended whole strawberries (previously frozen) with sugar, but next time, I will use some local honey

6. You are supposed to save out a half cup of the finished plain yogurt, so that you can start your next batch. I forgot to do this, so I will have to buy some plain yogurt again next time.

7. I miss being in New England where Stoneyfield Farms is. If you have the chance to visit there, do it! If you ever see their yogurt on the shelf, try it! I will hunt down some of their yogurt to start my next batch at home!

So what have you been putting off trying to do? 
There is a process that many times doesn't get completed, in my life anyway:
Knowledge--->Experience--->Confidence
And I would like to encourage everyone to DO something you've been thinking about trying for way too long.

Best Wishes!
from Mama Trep


.

Thursday, May 9, 2013

Soggy Garden

So, this is a new blog, and I have put it off for a bit, because I just don't know where to start. I suppose I have not given it a tremendous amount of thought, no really specific plans for this spot on the web, just wanting to get my ideas out there. I am just going to jump right in, as I am prone to do, on what is on my mind, and so...here it is.

I have never had too much of a formal garden. Ever. I had a spot by the front door where I put my peppermint in cinder blocks and my tomatoes. Both have been there for over four years now, and actually did quite well. We had a spot on the lower yard that was tilled by a good friend of mine a couple years ago, about 10 x 10 foot, where we put some peppers (prolific) and zucchini (blossoms just fell off), but that area floods if there is a heavy rain, because of Horse Creek, and this year, it has flooded more times than it has total in the 5 years since I've lived here.

I've been wanting a garden, so last fall we started piling up grass clippings and leaves, over about 5 or 6 layers of newspaper. We would toss in the rabbit bedding and rabbit poop, and coffee grounds, egg shells and banana peels from the house. It ended up about 10 x 10 feet on the upper yard.
The dark area to the left of the blue tarps is the original layered area.


We made Grand Plans over the winter, and decided that was too small...and rented a tiller for about half a day, expanding that space to roughly 10 x 25 feet. We also moved the front yard's stepping stones to allow for more garden space next to the house, a triangular garden about 15 foot at it's widest, about 15 feet along the house to the front door. We expanded the tomato/peppermint patch to the other edge of the house, so that when we mowed, there was more of a curve, and less niggling little spaces to mow. All in all, since last summer, we have probably quadrupled our growing spaces.
See the expanded prior tomato/peppermint area?
See how we moved the stepping stones here?

Work in progress, and only pic of the tiller!
Did I mention the tiller: 5 HP of pure hell? New tools were purchased to make all that clean up work easier and CLODS of grass were piled in the driveway to dry out. We found that the areas where the paper, grass, leaves, scraps and rabbit poop were layered have the most beautiful, black, dark soil, with a ton of worms! So this will become our preferred method of garden prep, and that bucking tiller will be banned from my life forever, and I will never have to do THAT again!

I guess it has just been too wet, or something. I haven't really paid attention to the waterfall amounts in northeast TN here, but the fact that we are flooding almost every time it rains hard tells me that the water table is up, or something. Every sunny day dries things out about a half inch or so deep, but all around, the grass is soggy, squishes where we walk The neighborhood ducks who like to muck around have been shooed only a couple times from the garden space (a small fence is going up soon), and I don't know what is going on underground, but up top our seedlings are just sitting there.

Did you ever read that Frog and Toad book, where one of them is yelling at the garden seeds: "GROW!" Hehehe, that's me. Fearless. Persistent. IMPATIENT.

When I say "we" it's me and my partner, Herman, who does the brunt of the physical work, unfortunately for him. Without him, this garden thing would never have happened. 
Happy Birthday, Herman!